Single Sign-on (SSO)
Help us refine SSO!
Our SSO feature is new and potentially rough around the edges. We would love to talk with you about what you’re using it for, whether it’s working for you, and any additional workflows you’d like us to support. If you talk to us for 20 min, we’ll give you a $25 gift card as a thank you!
Mathesar supports single sign-on (SSO) using any identity provider that implements the OpenID Connect (OIDC) standard, such as Okta, Azure Active Directory, Google Workspace, and others. Mathesar also supports signing in with GitHub (github.com). SSO allows users to use Mathesar without needing to maintain another set of credentials.
Configuring SSO is optional. By default, Mathesar has separate user accounts with their own passwords, as described in Mathesar Users.
Configuration schema versions
The sso.yml configuration file (and the equivalent environment variable) supports two schema versions:
- Version 1: OIDC providers only. Configured under
oidc_providers:. Existing installations continue to work unchanged. - Version 2: Adds support for GitHub alongside OIDC. Configured under
providers:with an explicittype:field (oidcorgithub) per provider.
If version: is omitted, Mathesar defaults to version 1. It is recommended to use version 2 as version 1 would be deprecated and removed in upcoming releases.
Setting up SSO
Assuming you already have an identity provider (IdP) set up, this guide explains how to set up SSO in Mathesar using that provider.
1. Configure your identity provider (IdP)
First, you’ll need to set up your IdP to be aware of Mathesar.
1a. Identify your IdP key
We support over a hundred OIDC IdPs (see the full list). You’ll need our “key” associated with it to configure your application’s callback URL in your IdP.
Here’s a list of common IdPs, with links to their documentation, and the key associated with each.
| Provider | Key | Provider | Key | Provider | Key |
|---|---|---|---|---|---|
| Apple | apple |
google |
linkedin |
||
| Auth0 | auth0 |
Kakao | kakao |
Microsoft | microsoft |
| GitLab | gitlab |
Keycloak | keycloak |
Okta | okta |
If you would like to use a different OIDC provider, find your IdP on this list and navigate to its page. The key is the part of the “development callback URL” between accounts/ and /login.
Using GitHub instead?
GitHub is not an OIDC provider, so it doesn’t appear in the table above. GitHub is identified by type: github in sso.yml (see Step 3c below). You can skip the IdP-key lookup for GitHub.
1b. Create the Mathesar application in your IdP
Create an OAuth application within your IdP using the process you usually follow.
During this process, you’ll be asked to specify a “Callback URL” (also called a Redirect URI or Login URL, depending on the provider). This is the URL your IdP uses to return users to Mathesar after a successful login.
In your provider’s settings, set the Callback URL to:
Ensure you replace the variables in the example URL above. Your SSO configuration will not work unless this URL is an exact match.
2. Enable SSO in Mathesar
Enabling SSO in Mathesar requires setting up a new configuration file or environment variable to hold the necessary IdP-related settings.
2a. Create configuration file.
You’ll either create a file named sso.yml or set up the SSO_CONFIG_DICT environment variable (formerly OIDC_CONFIG_DICT, which is still supported). Which you create, and where you save it depends on how you installed Mathesar:
If you used Docker Compose, create the sso.yml file next to your docker-compose.yml file:
Then uncomment the following lines in your docker compose file:
For direct installations, create sso.yml in the installation directory you defined while installing Mathesar.
If you deployed to an environment where you can’t use the local filesystem (e.g. DigitalOcean, Railway), you can use the SSO_CONFIG_DICT environment variable instead of an sso.yml file.
This variable must contain a JSON representation of the same data that sso.yml contains, wrapped in quotes and with quotes escaped. Here’s an example:
SSO_CONFIG_DICT="{\"version\": 2,\"providers\": {\"provider1\": {\"type\": \"oidc\",\"provider_name\": \"okta\",\"client_id\": \"client-id\",\"secret\": \"client-secret\",\"server_url\": \"https://trial-2872264-admin.okta.com\"}}}"
The legacy OIDC_CONFIG_DICT environment variable continues to work as an alias.
See Environment Variables for links to tools that simplify this process.
2b. Start with our sample configuration
Once you have sso.yml created, paste in our example configuration.
If you’re using SSO_CONFIG_DICT instead, we recommend starting with a YAML file and filling in the configuration before converting it to JSON.
3. Configuring your IdP in Mathesar
Here’s where you populate the configuration file.
3a. Retrieve needed information
You’ll need the following information handy for this step:
- For OIDC providers: the key associated with your IdP, from Step 1a, plus the OIDC issuer or discovery URL from your IdP’s documentation (e.g.
https://[YOUR-ORGANIZATION].okta.comfor Okta). - For GitHub: no extra identifier is needed;
type: githubis used directly. - The client ID and secret for the Mathesar OAuth application you set up in Step 1b. The secret may instead be called “client secret”, “token”, or “client key”.
3b. Basic setup (OIDC)
Once you have those, update sso.yml like so:
# Schema version 2 supports both OIDC and GitHub providers.
version: 2
providers:
+  [provider1]:
+    type: oidc
+    provider_name: [PROVIDER KEY]
+    server_url: [YOUR SERVER URL]
+    client_id: [YOUR CLIENT ID]
+    secret: [YOUR CLIENT SECRET]
Skip straight to Step 7 if you don’t need to configure restricted email domains, default Postgres roles, or additional providers.
3c. GitHub setup
Mathesar can sign users in using either a GitHub OAuth App or a GitHub App. The Mathesar configuration is identical (type: github) for both — they only differ in how you register and configure the application on GitHub. Pick whichever you already use, or whichever fits your installation/permission model better.
OAuth Apps grant capabilities at sign-in time via the OAuth scope parameter. Mathesar automatically requests the user:email and read:user scopes, so no extra app-side permission configuration is required to read the user’s verified primary email.
- On GitHub, go to Settings → Developer Settings → OAuth Apps → New OAuth App (under either your user account or an organization).
- Provide a name for your Oauth App, and for Homepage URL, specify
https://[YOUR MATHESAR DOMAIN]. - Set the Authorization callback URL to:
- After creating the app, generate a Client secret and copy both the Client ID and the secret.
-
Add a GitHub provider entry to
sso.yml:
GitHub Apps grant capabilities through account permissions configured on the App itself. The OAuth scope parameter is ignored for GitHub Apps, so the email scope Mathesar would otherwise request has no effect. You must explicitly grant email access at the App level for SSO to work.
- On GitHub, go to Settings → Developer Settings → GitHub Apps → New GitHub App (under either your user account or an organization).
- Provide a name for your GitHub App, and for Homepage URL, specify
https://[YOUR MATHESAR DOMAIN]. - Under Identifying and authorizing users, set the Callback URL to:
- Under Permissions & events → Account permissions, set Email addresses to Read-only. This is required: without it, GitHub will not let Mathesar read the user’s verified primary email, and matching SSO logins to existing Mathesar accounts will fail.
- Save the App. Generate a Client secret and copy both the Client ID and the secret.
- Add a GitHub provider entry to
sso.yml(same shape as for an OAuth App):
Re-authorization after changing App permissions
If you change a GitHub App’s account permissions after users have already authorized it, those existing authorizations enter a pending review state. The new permission (e.g. Email addresses) only takes effect once each user re-authorizes the App. New users get the new permission immediately on first authorization.
GitHub users must have a verified email
Mathesar matches SSO logins to existing users by email address. If a user’s GitHub account has no verified primary email, Mathesar will refuse the login. Users can verify an email in GitHub’s Settings → Emails page.
Email domain restriction is weaker for GitHub
Because anyone can register a GitHub account with any email address, allowed_email_domains: is a less reliable access-control mechanism for GitHub than it is for corporate OIDC providers. For tighter access control, consider pre-creating Mathesar user accounts so only known emails can be matched.
4. (Optional) Restrict to specific email domains
By default, users from any domain can log in to Mathesar, as long as they are registered with the IdP. You can change this to only allow users to log in if their domain of their email address is on a list of specific allowed domains.
You can use the allowed_email_domains setting to achieve this. It expects a list of domain names (e.g., ['example.com', 'mathesar.org']), like so:
version: 2
providers:
  provider1:
    type: oidc
    provider_name: okta
    server_url: https://trial-example-admin.okta.com
    client_id: YOUR_CLIENT_ID
    secret: YOUR_SECRET
+   allowed_email_domains: ['example.com', 'mathesar.org']
Now, only users whose email ends in @example.com or @mathesar.org will be allowed to log in. This setting also applies to type: github providers.
5. (Optional) Automatically provision new users with a specific role
By default, administrators need to manually assign PostgreSQL roles for each individual user, per database.
The default_pg_role block simplifies this process by allowing you to configure a specific PostgreSQL role to automatically assign the user the first time they log in via SSO. This must be configured per-database, as follows:
version: 2
providers:
  provider1:
    type: oidc
    provider_name: okta
    server_url: https://trial-example-admin.okta.com
    client_id: YOUR_CLIENT_ID
    secret: YOUR_SECRET
+   default_pg_role:
+     db1:
+       name: my_database
+       host: db.internal.example.com
+       port: 5432
+       role: readonly_user
+     db2:
+       name: analytics_db
+       host: analytics-db.example.net
+       port: 5432
+       role: analyst
This setting also applies to type: github providers.
Each database block must include the following:
name: The PostgreSQL database namehost: The hostname or IP address of the databaseport: The port on which the database is runningrole: The PostgreSQL role to assign to users
On first login, users will be granted the specified roles on each listed database. This only works for new users; existing users will have their roles preserved.
Overriding automatic provisioning
Since Mathesar preserves roles associated with existing users, administrators can take advantage of this and pre-create user accounts that they want to assign a different role to, and assign roles via the Mathesar UI. Then, when the user logs in for the first time, they’ll have the custom role that was assigned to them.
Example scenario
Acme, Inc. is setting up SSO and wants employees to have read-only access by default, except for the CTO and support engineers.
During the process of setting up Mathesar, they:
- create
read_onlyandread_writeroles in their PostgreSQL database - set
default_pg_roleto all databases toread_onlyin their SSO configuration - create user accounts for the CTO and the support engineers and assign them the
read_writerole - activate SSO and launch Mathesar internally
The CTO will now have write access when logging in for the first time, but the customer success manager will only have read access.
6. (Optional) Set up additional IdPs
Mathesar supports logging in using multiple IdPs. To add an additional IdP, add a provider2 block to your sso.yml file or SSO_CONFIG_DICT JSON and configure it just like above. You can mix OIDC and GitHub providers in the same providers: block.
7. Activate SSO
Once you’ve finished configuring SSO, restart Mathesar so it can load the updated sso.yml file or environment variable.
Visit your Mathesar installation and you should see your IdP as a log in option:
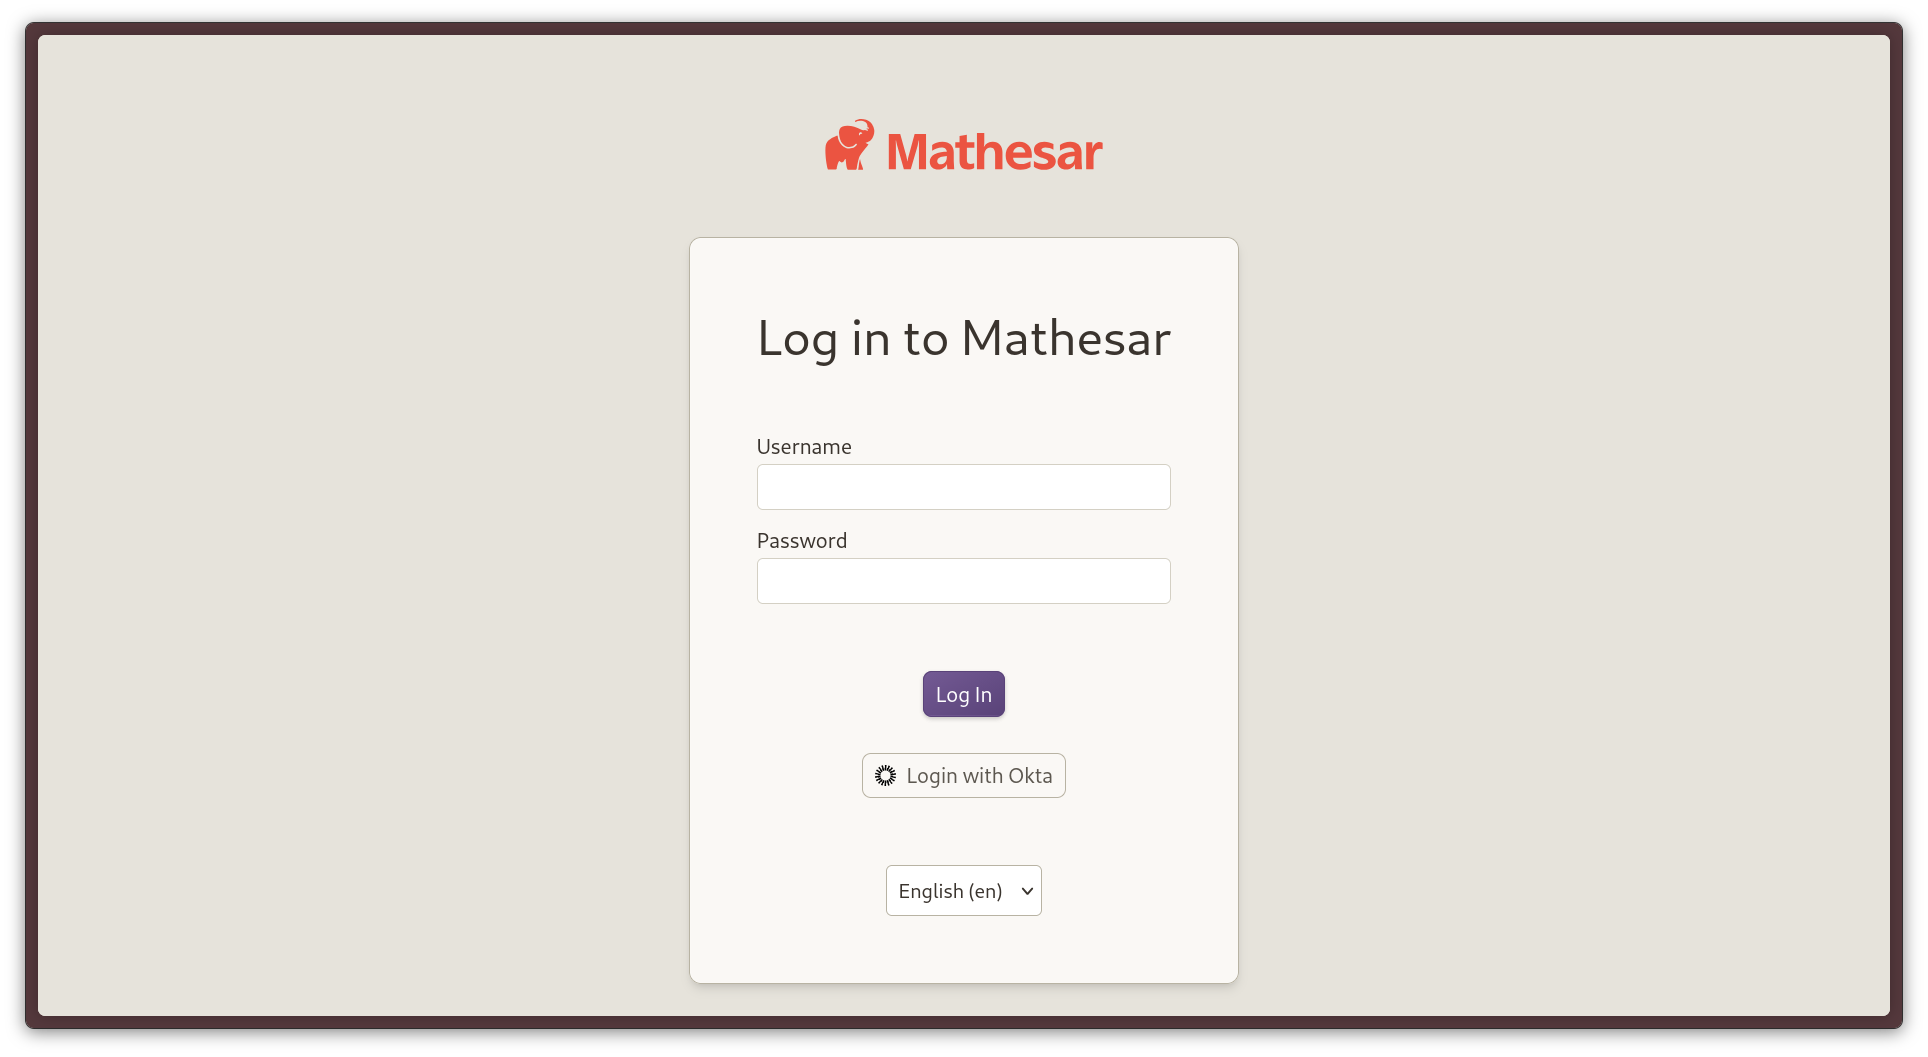
Mathesar’s login screen with Okta SSO enabled.
How to require SSO-only login
Once SSO is configured, you can optionally disable password-based login entirely so that all users must sign in via SSO. Set the REQUIRE_SSO_LOGIN environment variable to true and restart Mathesar.
Misconfiguration is handled gracefully
REQUIRE_SSO_LOGIN only takes effect when at least one SSO provider is configured. If you set it without configuring a provider, Mathesar logs a warning and continues to allow password login, so you cannot accidentally lock everyone out.
How to transition existing users to SSO
When a user logs in via SSO, Mathesar checks if their email address matches an existing user. If it does, they will be logged into the that existing account, with roles and access intact.
This means that if you already have users in Mathesar, you can transition to SSO seamlessly, as long as you ensure that their existing account’s email address exactly matches the email address used for SSO. If it does not, you will need to manually update their email via Mathesar’s UI before enabling SSO.
No exception for Mathesar admins
Once SSO is enabled, any account logging in will be connected to an existing user that matches, regardless of Mathesar privileges. This also applies to the default administrator account.
How to deactivate SSO
You can remove the option for users to use SSO by deleting the sso.yml file or SSO_CONFIG_DICT (and/or OIDC_CONFIG_DICT) environment variable and restarting Mathesar. Mathesar will then only support password-based authentication.
Deactivating SSO may require manual password resets
Note that Mathesar users who only logged in via SSO will not have known passwords. If SSO is deactivated, these users will not be able to log in until an admin resets their password through the Mathesar UI.